Microsoft Entra ID (Azure AD) Setup Guide
This guide provides step-by-step instructions for setting up Microsoft Entra ID (formerly Azure AD) as an authentication provider in Jarvis Registry.
Prerequisites
- An Azure subscription with Entra ID (Azure AD) tenant
- Access to the Azure Portal with administrative privileges
- Jarvis Registry deployed and accessible
Step 1: Create App Registration in Azure Portal
- Navigate to Azure Portal
- Go to Azure Portal
- In the search box, type “Azure Entra” and click on it.
-
On the left menu, click on App registrations and then on New registration.
-
Create New Registration
- Click New registration
- Name:
Jarvis Registry(or your preferred name) - Supported account types:
- For single tenant: Accounts in this organizational directory only
- Redirect URI:
- Type: Web
- URI:
https://your-registry-domain/auth/oauth2/callback/entra - Replace
your-registry-domainwith your actual registry URL, usehttp://localhost:8888/auth/oauth2/callback/entrafor local deployment
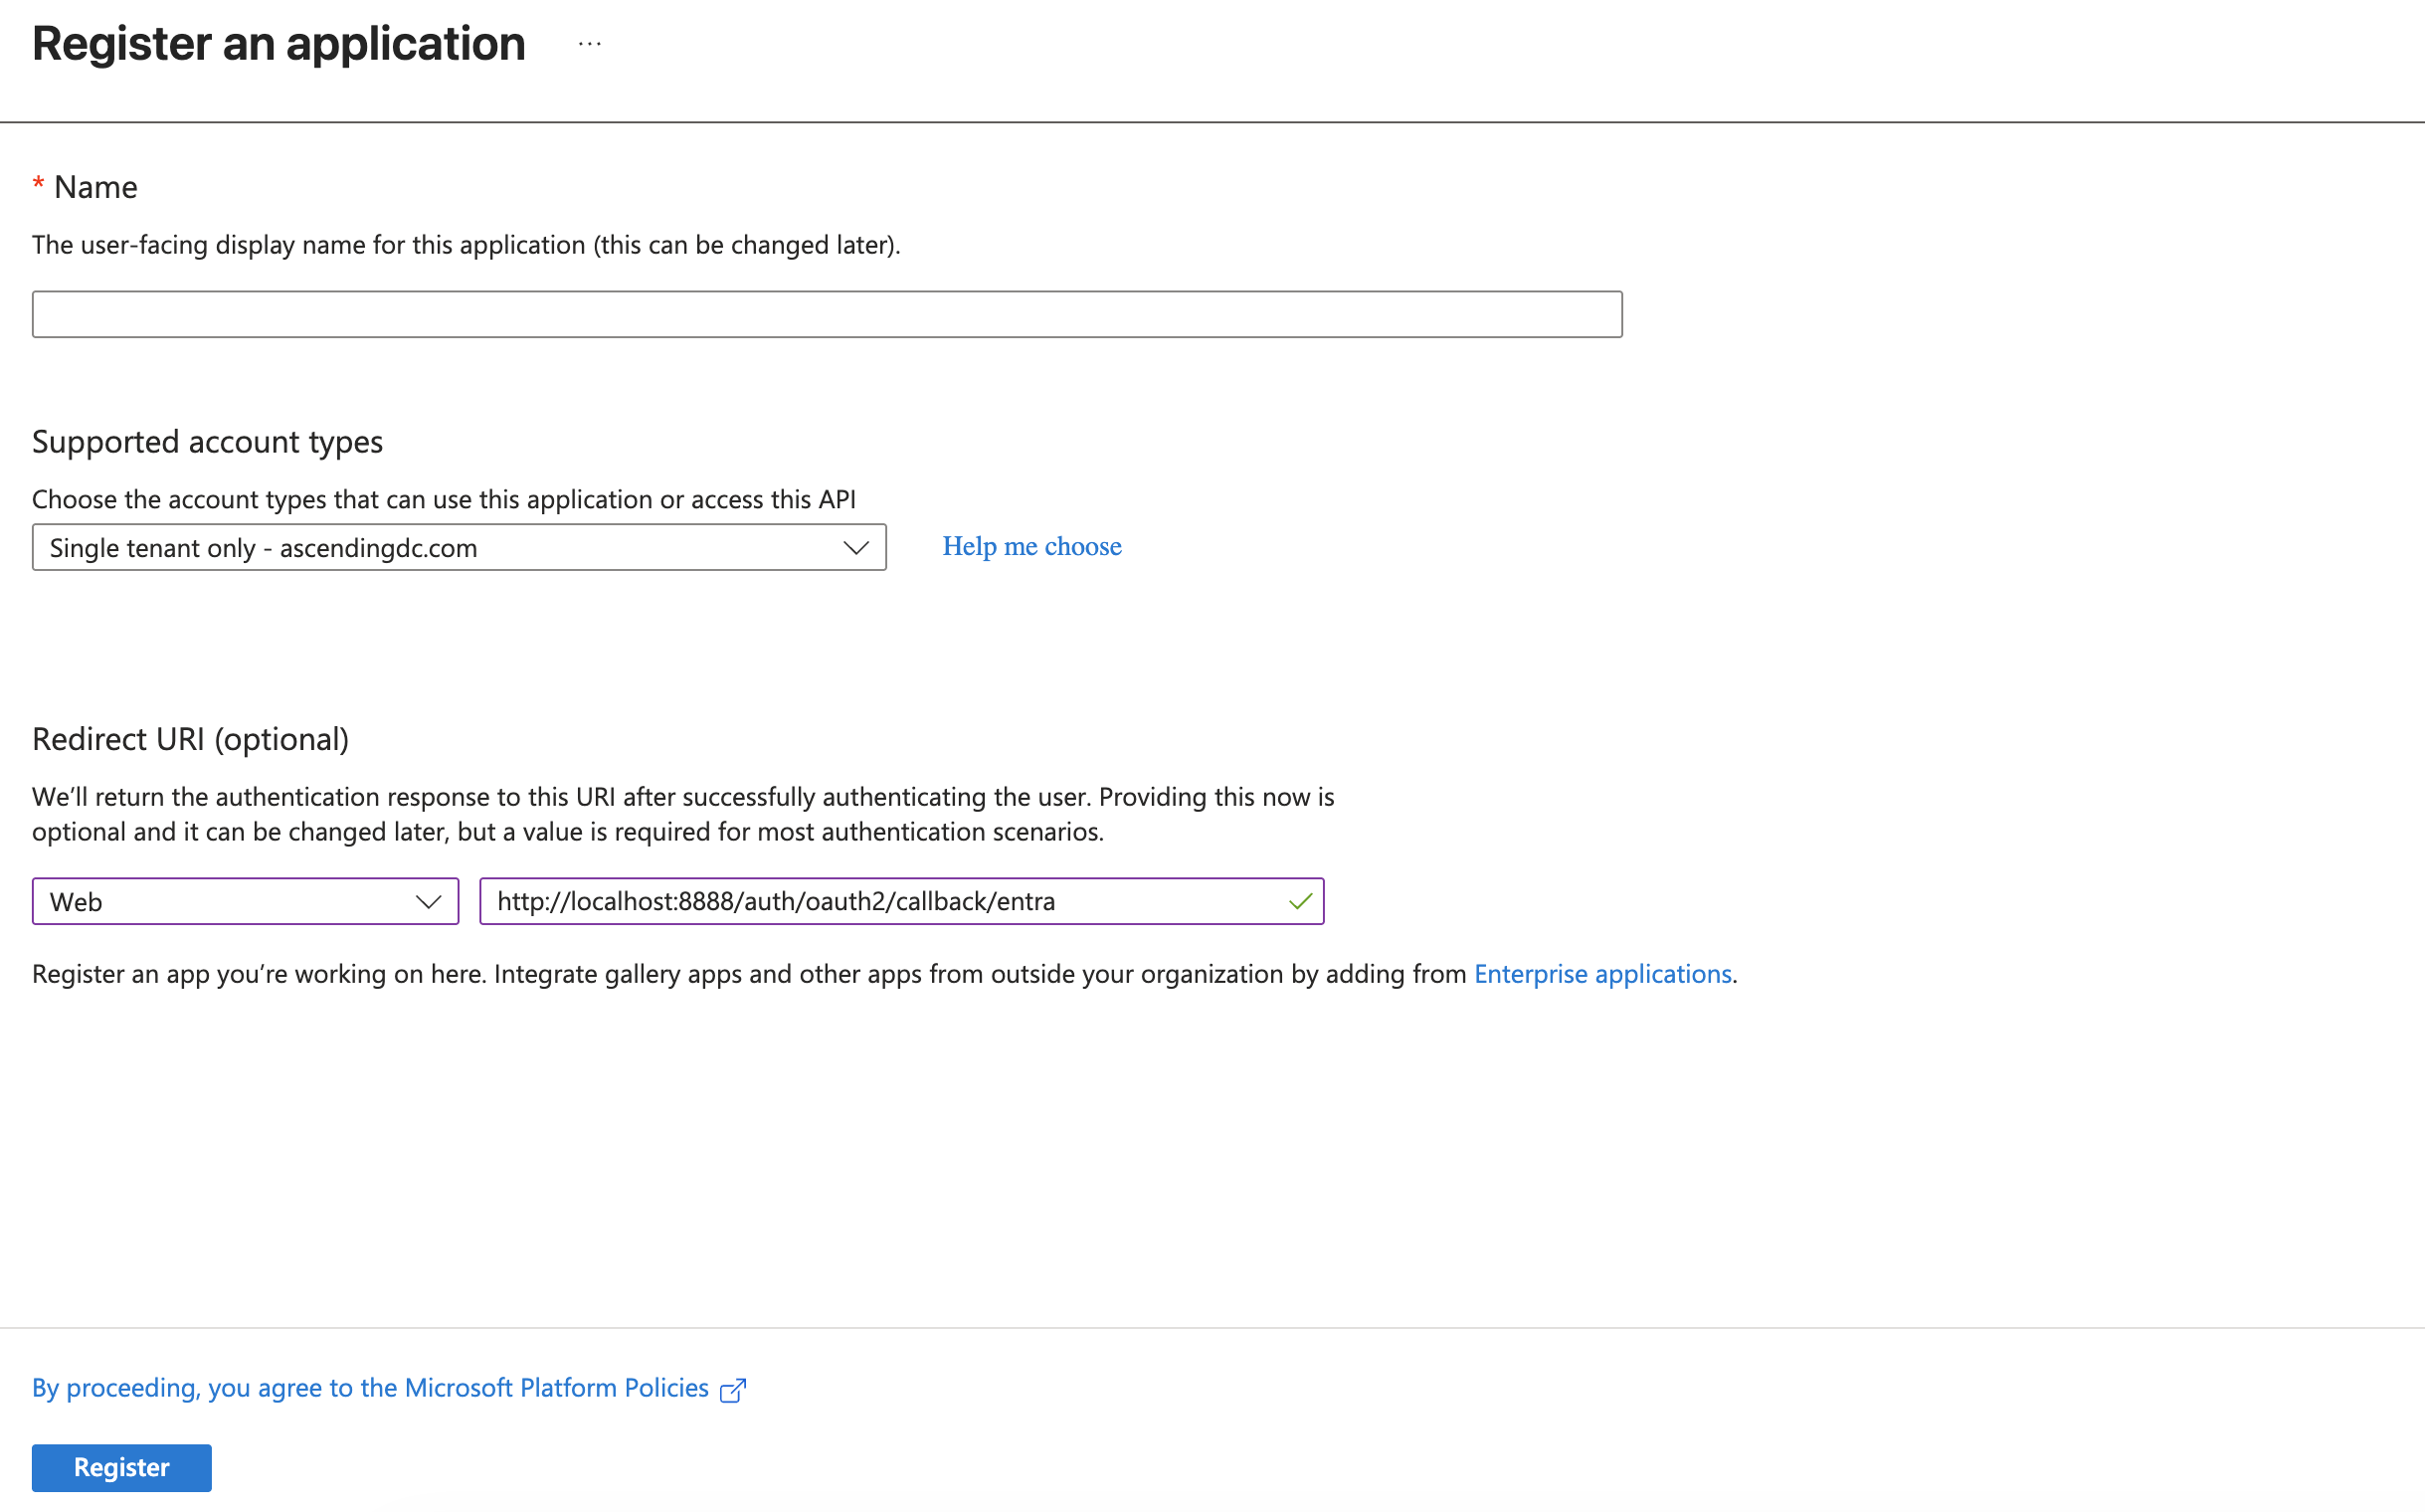
- Register the Application
- Click Register
- Note down the Application (client) ID and Directory (tenant) ID
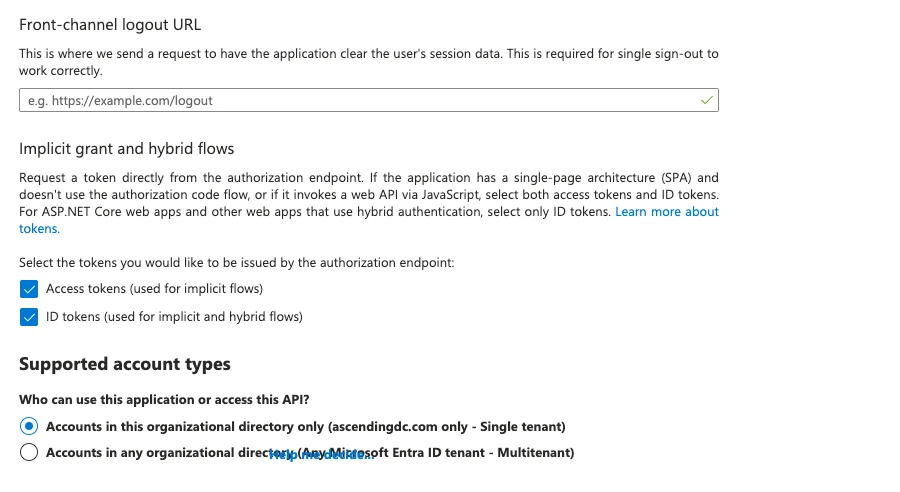
Step 2: Configure Authentication
- Configure Platform Settings
- In your app registration, go to Authentication
- Under Platform configurations, ensure your redirect URI is listed
- Implicit grant: Enable ID tokens and Access tokens
Step 3: Create Client Secret
- Generate New Secret
- In your app registration, go to Certificates & secrets
- Click New client secret
- Description:
Jarvis Registry Secret - Expires: Choose appropriate expiration (recommended: 12-24 months)
-
Click Add
-
Copy the Secret Value
- Important: Copy the secret value immediately - it won't be shown again
- Store this securely
Step 4: Environment Configuration
Add the following environment variables to your Jarvis Registry deployment:
Required Variables
# Microsoft Entra ID Configuration
ENTRA_CLIENT_ID=your-application-client-id
ENTRA_CLIENT_SECRET=your-client-secret-value
ENTRA_TENANT_ID=your-tenant-id-or-common
Optional Configuration Variables
# Token Configuration
# Determines which token to use for extracting user information
# - 'id': Extract user info from ID token (default, recommended)
# - 'access': Extract user info from access token
# If token extraction fails, the system will automatically fallback to Graph API
ENTRA_TOKEN_KIND=id

ENTRA_GRAPH_URL=https://graph.microsoft.com

# Custom Claim Mappings (defaults are shown)
ENTRA_USERNAME_CLAIM=preferred_username
ENTRA_GROUPS_CLAIM=groups
ENTRA_EMAIL_CLAIM=upn
ENTRA_NAME_CLAIM=name
Token Kind Configuration
The ENTRA_TOKEN_KIND variable determines how user information is extracted:
Screenshot: 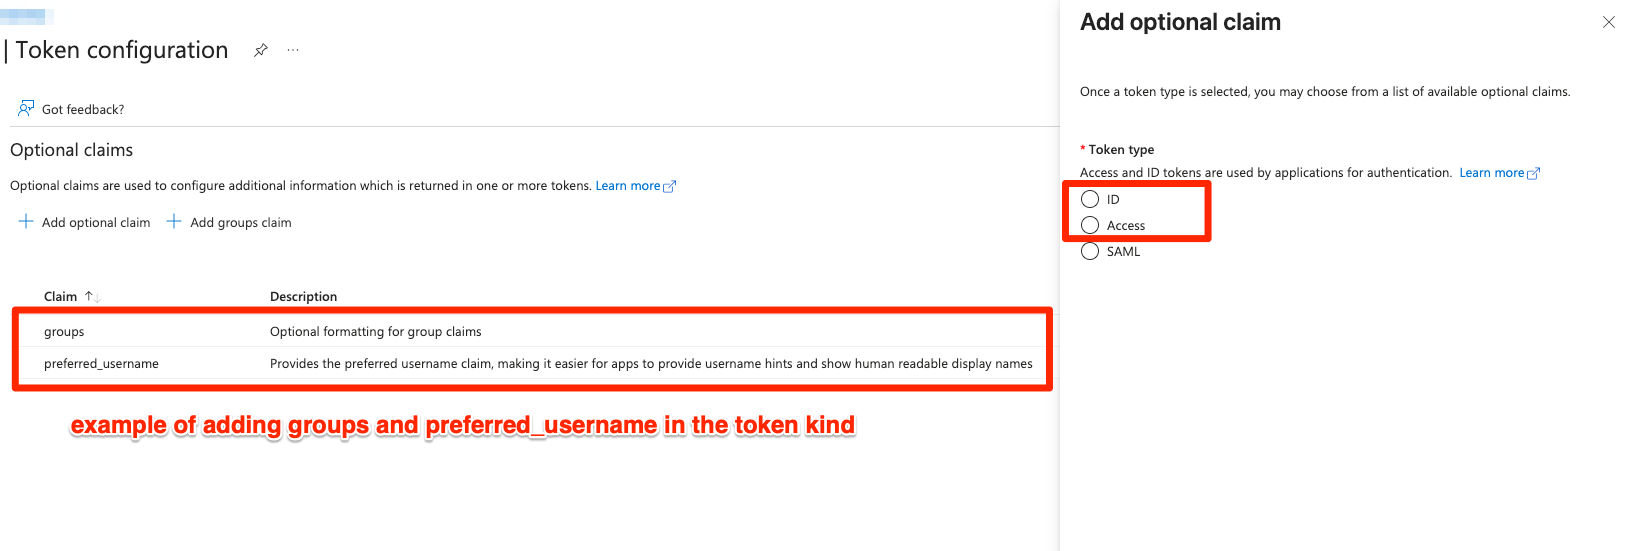
id(default, recommended): Extracts user info from ID token- Fast: Local JWT decoding, no network calls
- Standard: OpenID Connect standard approach
-
Contains standard user claims: username, email, name, groups
-
access: Extracts user info from access token - Used when ID token is not available
-
May not contain all user claims
-
Automatic fallback: If token extraction fails, the system automatically falls back to Microsoft Graph API
Example Configuration:
# Use ID token for user info (recommended - fast, standard OIDC)
ENTRA_TOKEN_KIND=id

# Use access token for user info (alternative)
ENTRA_TOKEN_KIND=access
Step 5: Test the Setup
- Restart Services
-
Restart the authentication server and registry services
-
Test Authentication Flow
- Navigate to your registry login page
- Select "Microsoft Entra ID" as the authentication method
- Complete the Microsoft login process
- Verify successful authentication and user information retrieval
Step 6: Optional Configurations
Group Membership Access
To retrieve user group memberships from Azure AD, ensure the following permissions are granted:
- In Azure Portal → Your app registration → API permissions
- Add Microsoft Graph → Delegated permissions:
Group.Read.All- Read all groups- Or
Directory.Read.All- Read directory data (includes groups) - Click Grant admin consent (requires admin privileges)
Note: Without these permissions, the groups field in user info will be empty, but authentication will still work.
Custom Scopes
Modify the scopes configuration in oauth2_providers.yml to include additional Microsoft Graph permissions as needed.
Troubleshooting
Common Issues
- Invalid Redirect URI
- Ensure the redirect URI in Azure matches exactly with your registry callback URL
-
Check for trailing slashes and protocol (http vs https)
-
Insufficient Permissions
- Verify all required API permissions are granted with admin consent
-
Check that the user has appropriate permissions in Entra ID
-
Token Validation Failures
- Verify client ID, tenant ID, and client secret are correct
-
Check token audience and issuer configuration
-
Sovereign Cloud Issues
- For Azure Government or China clouds, set the appropriate
ENTRA_GRAPH_URL - Ensure app registration is in the correct cloud environment
-
Verify OAuth endpoints match your cloud environment
-
Token Kind Configuration
- If using
ENTRA_TOKEN_KIND=idbut ID token is not available, system will fallback to access token - If using
ENTRA_TOKEN_KIND=access, ensure access token contains user claims - Check logs to see which token extraction method was used
Logs and Debugging
Enable debug logging to troubleshoot authentication issues:
Check authentication server logs for detailed error messages and token validation information.
Security Considerations
- Client Secrets: Rotate client secrets regularly and store them securely
- Token Validation: The implementation validates token signatures, expiration, and audience
- JWKS Caching: JWKS are cached for 1 hour to reduce API calls while maintaining security